`
Mailing
E-mails are not as easy as they should be. Luckily for you, Coravel solves this by offering:
- Built-in e-mail friendly razor templates
- Simple and flexible mailing API
- Render your e-mails for visual testing via ASP Controllers, etc.
- Drivers supporting SMTP, e-mailing to a local log file or BYOM ("bring your own mailer") driver
- Quick and simple configuration via
appsettings.json - And more!
Installation
CLI
Install the Coravel CLI:
dotnet tool install --global coravel-cli
Using the CLI, installer the mailer feature:
coravel mail install
This will install the Nuget package Coravel.Mailer, along with scaffolding some basic files for you:
~/Views/Mail/_ViewStart.cshtml- Configures mail views to use Coravel's e-mail templates~/Views/Mail/_ViewImports.cshtml- Allows you use Coravel's view components~/Views/Mail/Example.cshtml- A sample mail view~/Mailables/Example.cs- A sample Mailable
Config
Configure Mailer
From Program.cs in newer minimal .NET configurations:
var builder = WebApplication.CreateBuilder(args);

builder.AddMailer();
Using non-web projects, you would do this inside of your Startup.ConfigureServices() method:
services.AddMailer(this.Configuration); // Instance of IConfiguration.
Drivers
Coravel comes with multiple drivers that change where and how your e-mails are sent.
File Log Driver
This driver will send e-mails to a mail.log file in the root of your project. Great for development and testing.
P.S. Don't forget - you can render your e-mails to a browser for visual testing.
To use this driver, configure your appsettings.json file:
"Coravel": {
  "Mail": {
    "Driver": "FileLog"
  }
}
Smtp Driver
Add the following keys:
"Coravel": {
  "Mail": {
    "Driver": "SMTP",
    "Host": "smtp.mailtrap.io",
    "Port": 2525,
    "Username": "[insert]",
    "Password": "[insert]"
  }
}
Custom Driver
The custom driver allows you to decide how you want to send e-mails - using HTTP APIs, something else, etc.
The recommended way to configure a customer mailer is by implementing Coravel.Mailer.Mail.Interfaces.ICanSendMail. This class will allow your custom mailer to participate in the dependency injection configuration so that you can inject things like HTTP clients, etc.
To configure it, in Program.cs instead of calling AddMailer() you do:
var builder = WebApplication.CreateBuilder(args);

builder.Services.AddScoped<MyHttpApiCustomMailer>();
builder.AddCustomMailer<MyHttpApiCustomMailer>();
Here's an example of a custom mailer:
public class MyHttpApiCustomMailer : ICanSendMail
{
    private readonly IHttpClient _httpClient;

    public MyHttpApiCustomMailer(IHttpClientFactory httpFactory)
    {
        this._httpClient = httpFactory.CreateHttpClient("MailApi");
    }

    public async Task SendAsync(MessageBody message, string subject, IEnumerable<MailRecipient> to, MailRecipient from, MailRecipient replyTo, IEnumerable<MailRecipient> cc, IEnumerable<MailRecipient> bcc, IEnumerable<Attachment> attachments = null, MailRecipient sender = null)
    {
        // Code that uses the HttpClient to send mail via an HTTP API.
    }
}
Built-In View Templates
Coravel's mailer comes with some pre-built e-mail friendly razor templates! This means you don't have to worry about building a reusable template and store it in your database. But.... no one ever does that 😋.
TIP
If you used the Coravel CLI, it already created the file ~/Views/Mail/_ViewStart.cshtml. It defaults to use Coravel's "colorful" template.
If you wish to use the plain template, replace the file contents with this:
@{
    Layout = "~/Areas/Coravel/Pages/Mail/PlainTemplate.cshtml";
}
Global Template Configuration
What about static content like the mail footer and logo? Coravel's got you covered.
In your appsettings.json, you may add the following global values that will populate when using Coravel's built-in templates:
"Coravel": {
    "Mail": {
        /* Your app's logo that will be shown at the top of your e-mails. */
        "LogoSrc": "https://www.google.ca/images/branding/googlelogo/1x/googlelogo_color_272x92dp.png",

        /* If set, displayed in the footer. */
        "CompanyAddress": "1111 My Company's Address",

        /* If set, displayed in the footer inside the copyright statement. */
        "CompanyName": "My Company's Name",

        /* If set, is used to color the header (when using Template.cshtml) */
        "PrimaryColor": "#539be2"
    }
}
Mailables
Creating A Mailable
Coravel uses Mailables to send mail. You can create a C# class that represents a specific type of e-mail that you can send, such as "New User Sign-up", "Completed Order", etc. This approach is useful whenever you want to encapsulate the logic for this email type and can re-use it across your application (see next section for an alternative approach).
TIP
If you used the Coravel CLI, it already generated a sample Mailable in your ~/Mailables folder!
Mailables inherit from Coravel.Mailer.Mail.Mailable and accept a generic type which represents a model you want associated with sending your mail.
Here's a sample Mailable class:
using Coravel.Mailer.Mail;
using App.Models;

namespace App.Mailables
{
    public class NewUserViewMailable : Mailable<UserModel>
    {
        private UserModel _user;

        public NewUserViewMailable(UserModel user) => this._user = user;

        public override void Build()
        {
            this.To(this._user)
                .From("from@test.com")
                .View("~/Views/Mail/NewUser.cshtml", this._user);
        }
    }
}
All of the configuration for a Mailable is done in the Build() method.
You can then call various methods like To and From to configure the recipients, sender, etc.
Inline Mailables
You can create mailables on-the-fly if this is preferred. From the code that is trying to send an email - like a controller action or pub/sub handler - you can call either Mailable.AsInline() or Mailable.AsInline<T>().
The generic version allows you to send email using View(string viewPath, T viewModel):
public async Task<IActionResult> SendMyEmail()
{
    UserModel user = new UserModel()
    {
        Email = "FromUserModel@test.com",
        Name = "Coravel Test Person"
    };

    await this._mailer.SendAsync(
        Mailable.AsInline<UserModel>()
            .To(user)
            .From("from@test.com")
            .View("~/Views/Mail/NewUser.cshtml", user)
    );

    return Ok();
}
The non-generic version is suited to using Html() and/or Text() when passing a view model is not needed.
public async Task<IActionResult> SendMyEmail()
{
    UserModel user = new UserModel()
    {
        Email = "FromUserModel@test.com",
        Name = "Coravel Test Person"
    };

    await this._mailer.SendAsync(
        Mailable.AsInline()
            .To(user)
            .From("from@test.com")
            .Html($"<html><body><h1>Welcome {user.Name}</h1></body></html>")
            .Text($"Welcome {user.Name}")
    );

    return Ok();
}
From
To specify who the email is from, use the From() method:
From("test@test.com")
You may also supply an instance of Coravel.Mailer.Mail.MailRecipient to include the address and sender name:
From(new MailRecipient(email, name))
You can set a global from address by setting it in appsettings.json:
  "Coravel": {
    "Mail": {
      "From":{
        "Address": "global@from.com",
        "Name": "My Company"
      }
    }
  }
To
Using the To() method, you can supply the recipient's e-mail address and name.
Or, using an e-mail address in a string:
To("test@test.com")
You can also pass:
To(IEnumerable<string>)To(MailRecipient)To(IEnumerable<MailRecipient>)
Html
If you want to supply raw Html as your e-mail use the Html(string html) method:
public override void Build()
{
    this.To(this._user)
        .From("from@test.com")
        .Html(someHtml);
}
In this case, your Mailable class should use the string generic type: public class MyMailable : Mailable<string>.
Text
If you want to add a plain text representation of your email then use Text(string plainText):
public override void Build()
{
    this.To(this._user)
        .From("from@test.com")
        .Html(someHtml)
        .Text(plainText);
}
Text() doesn't replace Html() or View(). It adds a plain text representation to your email that the email client will use in the event it doesn't support HTML.
Sender
To specify the sender of the email (different from the From address), use the Sender() method:
Sender("test@test.com")
Attachments
Attach multiple files by passing an Attachment to the Attach() method.
Each attachment has a few fields to assign:
Bytes: Thebyte[]of the file you are attaching.Name: The name of the file to attach.ContentId: Often used for embedding images into emails. Assign a value that is unique within your email template.
Embedding Images
To embed images into your email you can assign the ContentId field with a unique value that will also be used in your email.
For example:
emailMessage
    .Attach(new Attachment
    {
        Name = "My Image",
        Bytes = myBytes,
        ContentId = "my-image"
    });
<html>
    <img src="cid:my-image" />
</html>
Coravel will automatically link the embedded resources to the email properly for you.
Auto-Detect Email Address And Name
Using an object that has a public field or property Email and Name, you can pass it to the To() method.
Coravel will auto-detect and use these fields.
TIP
You can use this method by injecting the object model via your Mailable's constructor, and then reference in the Build() method.
Subject
Coravel will use the name of your class (removing any postfix of "Mailable") to generate the subject of your e-mail.
Given a mailable with the name OrderCompletedMailable, a subject of "Order Completed" will be generated for you.
Alternatively, you may set the subject with the Subject() method.
Extra Methods
Further methods, which all accept either IEnumerable<string> or IEnumerable<MailRecipient>:
CcBccReplyTo
Mail Templates With View()
.NET Core 3.1+
For a standard .NET 6+ web project, this should work out-of-the-box. If using a shared library, the following applies.
In .NET Core 3.1 there were some breaking changes to the way razor views are handled.
If you have a shared library with razor views inside, you'll need to make sure .NET compiles them at build time by adding the following to your .csproj:
<Project Sdk="Microsoft.NET.Sdk.Razor">  👈 Make sure it's this SDK.

  <PropertyGroup>
    <AddRazorSupportForMvc>True</AddRazorSupportForMvc> 👈 Add this too.
  </PropertyGroup>
View
Using a razor view to send e-mails is done using the View(string viewPath, T viewModel) method.
TIP
You can still use Text(string planText) to add an alternative plain text representation beside the HTML message that calling View() produces.
The type of the viewModel parameter must match the type of your Mailable's generic type parameter. For example, a Mailable<UserModel> will have the method View(string viewPath, UserModel viewModel). Coravel will automatically bind the model to your view so you can generate dynamic content (just like using View() inside your MVC controllers).
For views that do not require a view model, just inherit your Mailable from Mailable<string> and use View(string viewPath).
public class MyMailable : Mailable<string>
{
    public override void Build()
    {
        this.To("some@email.com")
            .From("from@test.com")
            .View("~/Views/Mail/HasNoModelEmail.cshtml");
    }
}
TIP
The CLI generated a sample for you at ~/Views/Example.cshtml.
Let's say we have a Mailable that uses the view ~/Views/Mail/NewUser.cshtml.
It might look like this (which uses a built-in template):
@model App.Models.UserModel

@{
   ViewBag.Heading = "Welcome New User: " + Model.Name;
   ViewBag.Preview = "Preview message in inbox";
}

<p>
    Hi @Model.Name!
    @await Component.InvokeAsync("EmailLinkButton", new  { text = "click me", url = "www.google.com" })
</p>

@section links
{
    <a href="https://www.google.com">Google</a> | <a href="https://www.google.com">Google</a>
}
Mail Template Components
When using razor views, there are various pieces of data that Coravel will automatically passes for you:
Heading
Assigning a value to ViewBag.Heading will show up as the main heading in your e-mail.
Preview
Assigned a value to ViewBag.Preview will display as a "preview" on some email clients that support this feature.
Footer
The footer will grab values from your appsettings.json file, if they are set (see Global Template Configuration).
Template Sections
There are two main sections you can define in Coravel's templates by using the @section syntax.
Links
Links that are displayed in the footer.
@section links
{
    @* Put some html here *@
}
Footer
Override the entire footer with custom content.
@section footer
{
    @* Put some html here *@
}
Sending Mail
Basic
Inject an instance of Coravel.Mailer.Mail.IMailer and pass a Mailable to the SendAsync method:
private readonly IMailer _mailer;

public MyController(IMailer mailer)
{
    this._mailer = mailer;
}

// Inside a controller action...
await this._mailer.SendAsync(new NewUserViewMailable(user));
Queuing Mail
Assuming you are using Coravel's queuing feature, you can do this:
this._queue.QueueAsyncTask(async () =>
    await this._mailer.SendAsync(new MyMailable())
);
On-The-Fly Mailables
There may be instances when you want to be able to build / configure a Mailable dynamically. You can do this the following way.
- Define an empty Mailable class.
public GenericMailable : Mailable<string>
{
    public override void Build() { }
}
- "Build" your Mailable dynamically before sending:
var mail = new GenericMailable()
    .To("to@test.com")
    .From("from@test.com")
    .Html("<html><body><h1>Hi!</h1></body></html>");

await this._mailer.SendAsync(mail);
E-mail Components
The CLI generated a _ViewImports.cshtml file in the root of your mail views. This allows you to use Coravel's view components.
Email Link Button
Displays a clickable e-mail friendly button which will forward your user to a link you choose.
To use in your razor template, do this:
@await Component.InvokeAsync("EmailLinkButton", new { text = "click me", url = "www.google.com" })
The default color of the button is #539be2 (blue), but you may set two further optional arguments to change the color of the button:
backgroundColortextColor
Both arguments accept either a hex value or rgb/rgba value:
@await Component.InvokeAsync("EmailLinkButton", new { text = "click me", url = "www.google.com", backgroundColor = "#333" })
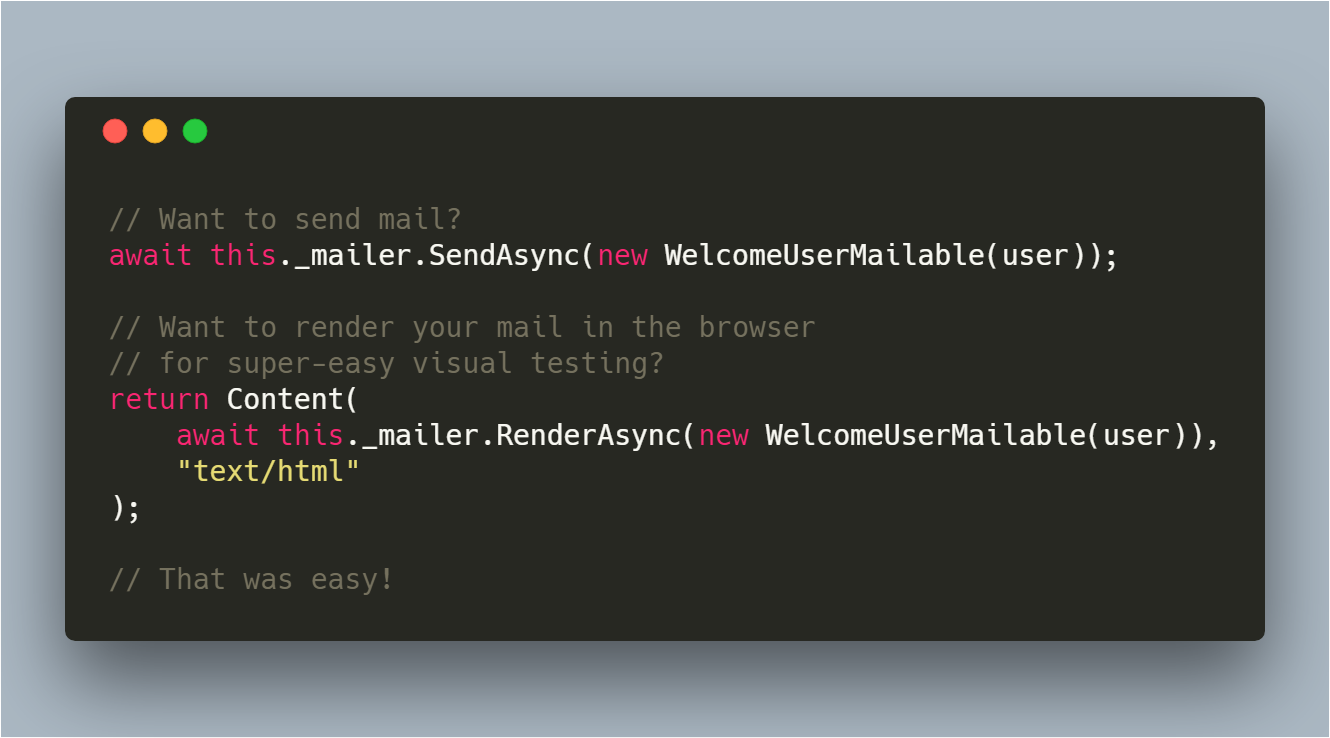
Visual Testing
Testing the visuals of your e-mails should be easy, right? With Coravel - it can be!
It's just like sending mail, except you call RenderAsync instead of SendAsync.
Here's how you might render a Mailable and return it as an Html response - for viewing in the browser:
// Controller action that returns a Mailable viewable in the browser!
public async Task<IActionResult> RenderView()
{
    string message = await this._mailer.RenderAsync(new PendingOrderMailable());
    return Content(message, "text/html");
}
TIP
Since we can only render 1 mail body, using Html() or View() will take precedence over Text() when rendering an email with RenderAsync().